Payment Methods Accepted
Use this section to configure what sources of funds you are willing to accept payments from. In order to accept payments using any method, you must have a merchant account or account with the individual service which allows you to process the payments. You may want to configure a real-time payment gateway before deciding what payment methods you will accept.
Credit Cards
In order to process credit card payments on your Website, you must have a compatible Merchant Account. ShopSite has integrated support for several real-time payment gateways, or you can manually process payments off-line.
| manual (off-line) | Select this option from the drop-down menu to process payments manually. To process a payment, view or download the order and enter the payment information into your payment processing system. Click Configure to modify your manual payment processing options. |
| Accept Safe | Select this option from the drop-down menu then click Configure to process payments in real-time using Accept Safe. |
| ACH Direct Payments Gateway | Select this option from the drop-down menu then click Configure to process payments in real-time using ACH Direct Payments Gateway. |
| Authorize.Net AIM | Select this option from the drop-down menu then click Configure to process payments in real-time using Authorize.Net. |
| Authorize.Net SIM | Select this option from the drop-down menu then click Configure to accept payments using the Authorize.Net SIM payment service. Customers who select to pay using credit card will be taken to the Authorize.Net website, where they can enter their payment information. |
| BluePay | Select this option from the drop-down menu then click Configure to process payments in real-time using BluePay. |
| BrainTree | Select this option from the drop-down menu then click Configure to accept payments using the Braintree. Customers who select to pay using credit card will be taken to the Braintree website portal that can look like an extension of the merchant's site, where they can enter their payment information. |
| CyberCash | Select this option from the drop-down menu then click Configure to process payments in real-time using CyberCash. This option is only visible to merchants who have previously configured the CyberCash gateway. This feature will not be available in future versions. |
| eWAY | Select this option from the drop-down menu then click Configure to process payments in real-time using eWAY. |
| First Data Global Gateway (formerly LinkPoint or YourPay) | Select this option from the drop-down menu then click Configure to process payments in real-time using First Data Global Gateway (formerly LinkPoint or YourPay). |
| First Data Global Gateway e4 | Select this option from the drop-down menu then click Configure to process payments in real-time using First Data Global Gateway e4. |
| Gateway Emulator | Select this option from the drop-down menu then click Configure to process payments in real-time using a Gateway Emulator that emulates the Authorize.Net gateway. |
| Lynk Systems | Select this option from the drop-down menu then click Configure to process payments in real-time using RBSLynk. |
| NetBanx | Check this box, then click Configure to accept payments using the NetBanx payment service. NetBanx is a UK based payment service which requires you to set up a NetBanx merchant account. Customers who select to pay using NetBanx will be taken to the NetBanx website, where they can enter their payment information. |
| Optimal Payments | Select this option from the drop-down menu then click Configure to process payments in real-time using Optimal Payments. |
| Paypal Payflow Link | Select this option from the drop-down menu then click Configure to process payments in real-time using PayPal's Payflow Link. |
| Paymentech Orbital Gateway | Select this option from the drop-down menu then click Configure to process payments in real-time using Paymentech Orbital Gateway. |
| PayPal Payflow Pro version 4 | Select this option from the drop-down menu then click Configure to process payments in real-time using PayPal Payflow Pro. |
| PayPal Payments Advanced | Select this option from the drop-down menu then click Configure to process payments in real-time using PayPal Payments Advanced. |
| PayPal Payments Pro | Select this option from the drop-down menu then click Configure to process payments in real-time using PayPal Payments Pro. |
| Plug'nPay | Select this option from the drop-down menu then click Configure to process payments in real-time using Plug'nPay. |
| PSiGate | Select this option from the drop-down menu then click Configure to process payments in real-time using PSiGate. |
| RX-Payments | Select this option from the drop-down menu then click Configure to process payments in real-time using RX-Payments. |
| Sage Pay (formerly Protx) | Select this option from the drop-down menu then click Configure to process payments in real-time using Protx. |
| Transaction Express | Select this option from the drop-down menu then click Configure to process payments in real-time using Transaction Express1. |
| VirtualPAY | Select this option from the drop-down menu then click Configure to process payments in real-time using NPC VirtualPAY. |
| Worldpay | Select this option from the drop-down menu then click Configure to accept payments using the Worldpay Payment Service. |
- Purchase Order - Customers will be prompted to enter a purchase order number on the Checkout screen. You must have an account that allows you to accept purchase orders, and ShopSite will not automatically verify or process these transactions.
- C.O.D. - Customers who select Cash On Delivery will not be prompted to enter any payment information on the Checkout screen. If you wish to accept Cash On Delivery payments, you must use a service that allows this option. ShopSite will not automatically process Cash On Delivery transactions.
- Check - Customers who select to pay using a Check will be prompted to enter their bank account and routing number on the Checkout Screen. You may then manually process the payment as an electronic check. ShopSite will not automatically verify or process Check payments.
- Generic Payment Options - You may configure ShopSite to accept payments from one or two non-integrated payment methods. For example, if you wanted to provide a line of store credit, you could use these fields to prompt for the customer's name and store credit account number (to be handled offline; ShopSite will not automatically process these transactions.).
Check the box(es) for the Generic Payment Options (1 and/or 2) you wish to use. Up to four fields can be used to collect customer information. You can configure the names of the payment options and the names of the fields on Preferences > Store Text > Checkout Changes made to the names will be reflected on the Payment Options page. You can mask or hide some of the data entered in these fields on the customer's receipt by setting the checkbox next to the desired fields. Any fields that will not be used to gather customer information will need to be cleared. This means that if you only plan to use the first two fields of Generic Payment Option 1, you will need to clear the text from "Generic Payment Option 1 Field 3" and "Generic Payment Option 1 Field 4".
The 4 check boxes below each Generic Payment Option are used to indicate which of the 4 possible data fields for that payment method will be masked on the Thank You screen and email receipts. This allows you to mask critical information such as an account number or special code so they won't be visible on the receipt. If the box is not checked the data from the field will be visible on receipts.
Human Validation
If you are having trouble with bots (automatic scripts) testing stolen credit card numbers on your site, you can use this feature to verify that the form is being completed by a real, human customer. Based on your settings, ShopSite can create an image with random numbers in it. The customer will be required to enter those numbers into the form to continue the checkout process. Because of the way the image is generated, bots are unable to read the numbers, and therefore are unable to test the stolen credit cards using your shopping cart.
- Off - never display a human validation image.
- Always On - always display a human validation image.
- On, but only after the number of failed attempts has been reached - Specify a Failed Attempts Limit. If a customer submits bad payment information the specified number of times, ShopSite will display a human validation image for any further attempts to submit payment information by that customer.
- Basic - Basic CAPTCHA uses a simple crosshatch over the passphrase. Here's an example:

- Advanced - Advanced CAPTCHA uses an unlevel text with distracting decorations. Here's an example:

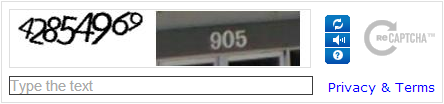
- reCAPTCHA (by Google) - reCAPTCHA uses a combination of unlevel text and an image of additional text that it hasn't identified yet. The user inputs both entries separated by a space. It also has controls to get new challenges. Here's an example:
- reCAPTCHA v2 (by Google) - reCAPTCHA v2 uses a simple check box. The user clicks the box labeled "I'm not a robot" and the CAPTCHA determines whether or not it needs to display some text for input. This method requires the merchant to register their domain with Google. Here's an example:

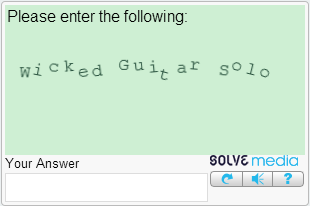
- TYPE-IN (by Solvemedia) - TYPE-IN uses an unlevel phrase (often a catchphrase or tagline for a popular product). It also has controls to get new challenges. Here's an example:
You can click the Test button for any of the CAPTCHA options to get a preview of that CAPTCHA.
